//jerrywalsh.org

coding, hacking, startups, computer security, technology and more

7 Habits for Effective Text Editing

It’s goes without saying - Vim kicks ass.  As my editor of choice I found this video quite informative:

The following video will give an overview of the large number of ways of using Vim in a smart way to edit programs, structured text and documentation.  Examples will be used to make clear how learning a limited number of habits will avoid wasting time and lower the number of mistakes.

This video is presented by Bram Moolenaar, whom is mostly known for being the benevolent dictator (and author) of the text editor Vim.  He also did the A-A-P project in between Vim version 6.0 and 7.0. Now he works for Google in Zurich, still improving Vim on the side.

FreeBSD - Installation and Migration to a New SATA Harddisk

My old dual 300GB ATA mirrored disks were becoming full and the pains of having low disk space were becoming too much of a strain, it was time to get some bigger disks…

This article explains the procedures required in FreeBSD to install and partition the new disks as well as migrating the data from the older disks using RSYNC.

My current configuration:

Filesystem      Size    Used   Avail Capacity  Mounted on
/dev/ad8s1c     3.0G    290M    2.5G    10%    /
devfs           1.0K    1.0K      0B   100%    /dev
/dev/ad8s3c     446G    405G    5.7G    99%    /usr
procfs          4.0K    4.0K      0B   100%    /proc
/dev/ad10.eli    458G    412G    9.6G    98%    /mnt/backup
/dev/ad0.eli     275G    252G    895M   100%    /mnt/300gb_primary
/dev/ad1.eli     275G    228G     25G    90%    /mnt/300gb_backup

Unfortunately the two 300GB drives are ATA which is now an old technology, since I was taking a plunge I may aswell move to something better while I’m making the change at all.

Required Hardware

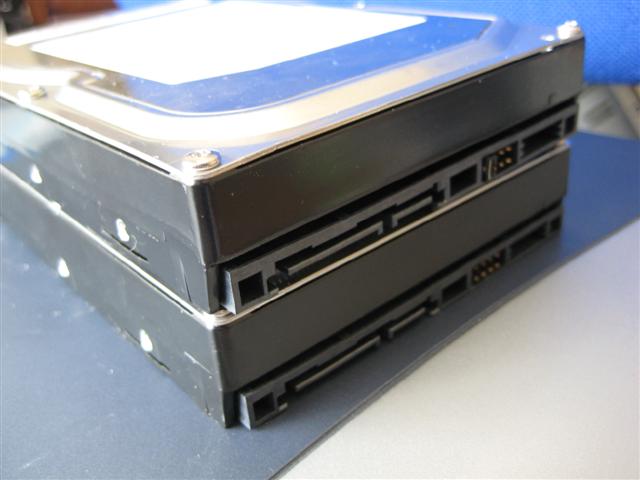
A quick look on Komplett (whom I whole heartedly recommend) and 2 x Samsung spinpoint 500GB SATA disks were purchased on special for only €144.

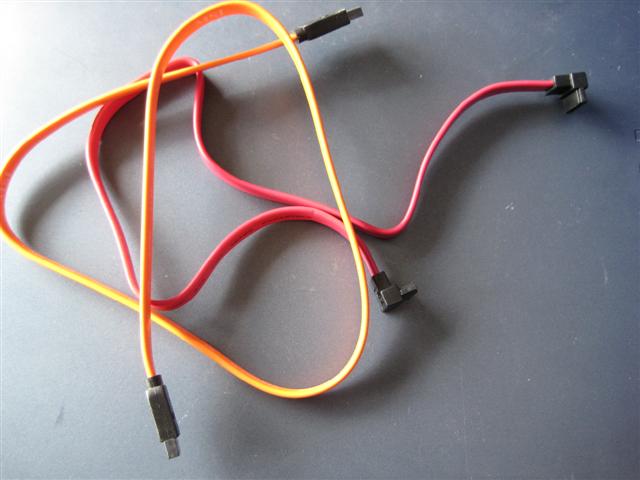
Two SATA cables (i just had these lying around):

And a SATA interface, or in my case a Sunsway/ST Lab PCI SATA interface because the existing 500GB’s are already using up the motherboard’s SATA slots.

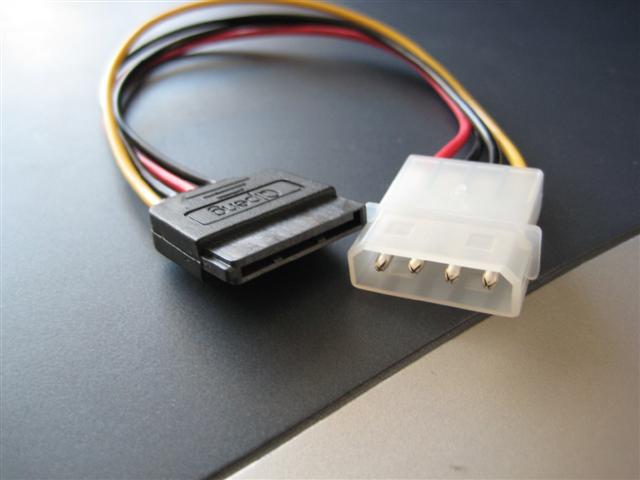
Unfortunately I didn’t fully investigate what was required and upon inspection I discovered I needed more SATA power connectors since the two existing connectors were being used, as a result the following little gadget was purchased from maplin:

Installation Procedure

The SATA PCI card was installed, the two disks attached to it via the SATA cables and the drives were powered by connecting them to the PSU via the SATA power adapters. The adapters I got from maplin had poor quality PSU connectors on them (the white ones) where the pins could move.. this made it painful to connect up since all 4 pins had to be aligned before the connector properly fit.

Everything was switched on and FreeBSD began its bootup, all drives were successfully detected as can be seen on the dmesg output:

ad0: 286168MB <WDC WD3000JB-00KFA0 08.05J08> at ata0-master UDMA100
ad1: 286168MB <WDC WD3000JB-00KFA0 08.05J08> at ata0-slave UDMA100
ad4: 476940MB <SAMSUNG HD501LJ CR100-12> at ata2-master SATA150
ad6: 476940MB <SAMSUNG HD501LJ CR100-12> at ata3-master SATA150
ad8: 476940MB <SAMSUNG HD501LJ CR100-10> at ata4-master SATA150
ad10: 476940MB <SAMSUNG HD501LJ CR100-10> at ata5-master SATA150

I use an encrypted disk configuration using GELI and so before we can use FDISK to partition the drives we must initialize disk encryption, at this point I should point out that for more details on configuring disk encryption on FreeBSD see encrypting file system partitions in FreeBSD article.

Firstly, we initialize disk encryption on the devices. Since I’m already using disk encryption we’re going to use my old key for initializing the encryption. This is the same keyfile I use for all my drives:

[root@orion] (/etc): geli init -s 4096 -K /root/.geli_keys/ad1.key /dev/ad4
Enter new passphrase:
Reenter new passphrase:
[root@orion] (/etc): geli attach -k /root/.geli_keys/ad1.key /dev/ad4
Enter passphrase:
[root@orion] (/etc): tail -3 /var/log/messages
Apr 12 11:56:21 orion kernel: GEOM_ELI: Device ad4.eli created.
Apr 12 11:56:21 orion kernel: GEOM_ELI: Encryption: AES-CBC 128
Apr 12 11:56:21 orion kernel: GEOM_ELI:     Crypto: software

The same procedure is repeated for the ad6 disk.

When that’s done we newfs the entire disks (for my needs I prefer to have one enormous slice):

[root@orion] (/etc): newfs /dev/ad4.eli > /ad4_superblocks.txt
[root@orion] (/etc): newfs /dev/ad6.eli > /ad6_superblocks.txt

Note that I have redirected the newfs output to a text file since the superblock locations can be useful for disaster recovery.

Then, I enable softupdates:

[root@orion] (/etc): tunefs -n enable /dev/ad4.eli
tunefs: soft updates set
[root@orion] (/etc): tunefs -n enable /dev/ad6.eli
tunefs: soft updates set

Now we need to mount these disks, so we create appropriately named mount points:

[root@orion] (/etc): mkdir /mnt/{500gb_primary,500gb_backup}

And now our /etc/fstab entries:

# New 500GB SATA disks
/dev/ad4.eli /mnt/500gb_primary ufs rw 0 0
/dev/ad6.eli /mnt/500gb_backup ufs rw,noauto 0 0

Next we mount the drives at our mountpoints:

[root@orion] (/etc): mount /mnt/500gb_primary/
[root@orion] (/etc): mount /mnt/500gb_backup/

And just to confirm that we’re looking good:

 Filesystem       Size    Used   Avail Capacity  Mounted on
/dev/ad8s1a      3.0G    290M    2.5G    10%    /
devfs            1.0K    1.0K      0B   100%    /dev
/dev/ad8s3c      446G    405G    5.7G    99%    /usr
procfs           4.0K    4.0K      0B   100%    /proc
/dev/ad10.eli    458G    412G    9.6G    98%    /mnt/backup
/dev/ad0.eli     275G    252G    895M   100%    /mnt/300gb_primary
/dev/ad1.eli     275G    228G     25G    90%    /mnt/300gb_backup
/dev/ad4.eli     458G    8.0K    422G     0%    /mnt/500gb_primary
/dev/ad6.eli     458G    8.0K    422G     0%    /mnt/500gb_backup

Yes, truly blissful.

Anyway, the disks are now ready for use, let’s migrate over all the data using RSYNC:

[root@orion] (/etc): rsync -av --progress /mnt/300gb_primary/ /mnt/500gb_primary/

For laughs this small little tcsh script helps keep an eye on the overall progress:

[jbw@orion] (~): while (1)
while? clear; df -h | grep ad4
while? sleep 1
while? end
/dev/ad4.eli     458G    2.9G    419G     1%    /mnt/500gb_primary

Now it’s coffee time since this has to copy 300GB of data so it’s gonna take a little while….

Snowboarding Trip at Obergurgl in Austria, 2008

Known as the ‘gem at high altitude’, Obergurgl in Austria is the highest parish in the country .  Here’s some photos from the xmas 2008 snowboarding trip.


Off piste, Next to the NedderHutte, Obergurgl, Austria.
 
 
Off piste Mountain exploration this time off the Hohe Mut, Obergurgl, Austria 


A Troubled Skier
 
Treacherously steep off piste slope @ hohe mut, obergurgl.
 

29th Dec 2007 to 3rd Jan 2008 - 1 week, gone in a flash. Oh well, see you next year!

Encrypting File System Partitions in FreeBSD

I’ve lost a lot of data in the past and learning from these mistakes my current system is setup with a mirrored disk configuration. I have two 500GB disks (sata) and two 300GB disks (ide). On a weekly basis I use rsync to backup the primary drives to their secondary mirrors. This way I can ensure that I always have dual copies of all my important data. For multiple reasons I now wish to encrypt this data so that in the event of someone gaining physical access to this machine they would not be able to read the data if they didn’t have the correct passphrase.

Firstly, let’s take a look at the relevant bits from /etc/fstab

[root@orion] (~): grep 300 /etc/fstab
/dev/ad0s1 /mnt/300gb_primary ufs rw 0 0
/dev/ad1s1d /mnt/300gb_backup ufs rw,noauto 0 0

My plan was to experiment with the filesystem encryption on the secondary disk first. If that proved successful I could then copy all the contents from the primary to the newly encrypted secondary and then move on to making the primary encrypted aswell.  Since I’m running FreeBSD 6 I opted to use the newer GELI encryption system - for the sake of getting jumping into experimentation immediately I opted to just use the kernel modules rather than compile support for GELI into the kernel so let’s begin:

[root@orion] (~): kldload geom_eli
[root@orion] (~): echo 'geom_eli_load="YES"' >> /boot/loader.conf

This loads the geli module into the kernel and the second line ensures that it’s automatically loaded upon boot.  Next we create our master key, initialize geli on the ad1 disk and finally attach the geli provider:

[root@orion] (~): dd if=/dev/random of=/root/.geli_keys/ad1.key bs=64 count=1
1+0 records in
1+0 records out
64 bytes transferred in 0.000059 secs (1082401 bytes/sec)
[root@orion] (~): geli init -s 4096 -K /root/.geli_keys/ad1.key /dev/ad1
Enter new passphrase:
Reenter new passphrase:
[root@orion] (~): geli attach -k /root/.geli_keys/ad1.key /dev/ad1
Enter passphrase:

Success, as confirmed by /var/log/messages:

Oct 28 13:09:06 orion kernel: GEOM_ELI: Device ad1.eli created.
Oct 28 13:09:06 orion kernel: GEOM_ELI: Encryption: AES-CBC 128
Oct 28 13:09:06 orion kernel: GEOM_ELI:     Crypto: software

With the geli provider attached to the ad1 device we can now work with the disk as normal via the ad1.eli device and geli will transparently handle all the encryption so now we confirm the existance of the geli device and then newfs the encrypted disk:

 [root@orion] (~): ls /dev/ad1*
/dev/ad1      /dev/ad1.eli
[root@orion] (~): newfs /dev/ad1.eli
/dev/ad1.eli: 286168.1MB (586072360 sectors) block size 16384, fragment size 4096
        using 850 cylinder groups of 336.98MB, 21567 blks, 21568 inodes.
super-block backups (for fsck -b #) at:
 160, 690304, 1380448, 2070592, 2760736, 3450880, 4141024, 4831168, 5521312, 6211456,
6901600, 7591744, 8281888, 8972032, 9662176, 10352320, 11042464... etc. etc.

Next it’s time to modify our fstab so it’s looking at ad1.eli instead of ad1s1d :

[root@orion] (~): sed -i .bak -e 's/ad1s1d/ad1.eli/' /etc/fstab
[root@orion] (~): grep 300 /etc/fstab
/dev/ad0s1 /mnt/300gb_primary ufs rw 0 0
/dev/ad1.eli /mnt/300gb_backup ufs rw,noauto 0 0
[root@orion] (~): mount /mnt/300gb_backup/

There you have it - surprisingly easy.. and surprisingly powerful. Out of curiousity I decided to do a quick performance test:

[root@orion] (~): dd if=/dev/zero of=/mnt/300gb_backup/test.img count=10000 bs=1024
10000+0 records in
10000+0 records out
10240000 bytes transferred in 0.387872 secs (26400463 bytes/sec)
[root@orion] (~): dd if=/dev/zero of=/mnt/300gb_primary/test.img count=10000 bs=1024
10000+0 records in
10000+0 records out
10240000 bytes transferred in 0.158931 secs (64430469 bytes/sec)

So it’s a little slower than I expected but still, I can live with that for the benefits it provides.

To ensure the drive is mounted upon boot I needed to add the following to my /etc/rc.conf:

geli_devices="ad1"
geli_ad1_flags=" -k /root/.geli_keys/ad1.key"

Now it’s time to copy the data from the primary disk to this encrypted disk and repeat this process for the primary disk and I’m all done!

Here Comes Another Bubble - Bubble 2.0

With all the hype around Facebook and completely overblown valuations on tech companies I really think this video hits the nail on the head:

Here comes another bubble, indeed.

Converting Vpopmail Aliases to Ezmlm Mailing Lists

Ezmlm (EaZy Mailing List Manager) is a powerful mailing list solution for qmail. It also works well with Inter7’s VPOPMAIL too. From a standard ports install (/usr/ports/mail/vpopmail/) , vpopmail will live in /usr/local/vpopmail/ on a FreeBSD system. Here’s a small tcsh based script which can be used to create mailing lists for domains. It takes two parameters the LISTNAME(@domain.dom) and the domain name itself. The script checks for the existance of an existing dot qmail file. If one exists the contents will be subscribed to the mailing list (NOTE: This script does NOT cater for “| forward” style lines!). Anyway.. this may be useful to some people..

#!/bin/tcsh -f
#
#  Make a mailing list for a vpopmail hosted domain
#
# Author: jbw
# WWW: www.jerrywalsh.org
#

set LISTNAME="$1"
set DOMAIN="$2"
set BASEDIR="/usr/local/vpopmail/domains/$DOMAIN/"
set LISTFILE="$BASEDIR/.qmail-$LISTNAME"
set LISTDIR="$BASEDIR/lists/$LISTNAME/"

if ( "$LISTNAME" == "" ) then
  echo You must specify a list name
  exit 1
endif

if ( "$DOMAIN" == "" ) then
  echo You must supply a domain name
  exit 2
endif

if ( ! -d "$BASEDIR" ) then
  echo The domain $DOMAIN is not hosted by VPOPMAIL.. add the domain first.
  exit 3
endif

if ( ! -d "$LISTDIR") then

  if ( -e "$LISTFILE" ) then
    echo Migrating the following emails to the $LISTNAME mailing list...
    cat "$LISTFILE" && \
    mv "$LISTFILE" "$LISTFILE\_"
    echo -----------------------------------------------------------------
  endif

  /usr/local/bin/ezmlm-make $LISTDIR $LISTFILE $LISTNAME $DOMAIN && \
  chown -R vpopmail:vchkpw $LISTDIR

  if ( -e "$LISTFILE\_" ) then
    tr -d '&' < "$LISTFILE\_" | /usr/local/bin/ezmlm-sub $LISTDIR && \
    rm "$LISTFILE\_"
  endif
else
  echo The $LISTNAME@$DOMAIN mailing list already exists, since the following dir exists:
  echo $LISTDIR
endif
```

Resurrecting Harddisks With Damaged Filesystems in FreeBSD

I found two old dead maxtor harddisks I had lying about the place, a 160GB and a 200GB, both were used as storage media on a FreeBSD server (4.X to be exact so these were UFSv1 partitions).

I plugged in the 160GB to my pc.. It would mount but drive performance was awful (in the region of 400kb/s transfers) and after approx 10 minutes it’d fail completely hanging the PC.. anyway.. it appeared from looking at the contents of the drive that I had managed to salvage most of the data from this drive previously so, I moved on to the 200GB hdd instead.   I plugged in the the drive, and the kernel spewed some geom related ‘uncorrectable’ errors.. I figured this drive must have suffered from some bad sectors.    FSCK confirmed this and I discovered the bad sectors corrupted the primary superblock on the partition.  Fortunately fsck managed to locate an alternate superblock which was still intact. Fiddling a bit with “dd”, I discovered there was only 3-4 sectors which were bad at the start of the partition.  Because the sectors were bad there was no way for me to mount the partition, even if the alternate superblock was good.

I used dd_rescue  ( from /usr/ports/sysutils/dd_rescue ) to take an image of the bad drive and copy it to a larger 500GB drive. It’s important to note that the size of the target drive does NOT matter - as long as it’s either the same size or larger than the original drive.  The downside of using a larger target drive is that you won’t be able to make full use of all the space on the drive, but i’d imagine that’s a job for some partition resizing utility to solve. Anyway.. dd_resure is basically a modified version of dd but designed for dealing with bad sectors. it’ll use a large blocksize and reduce the block size if it encounters any bad sectors whilst copying. If after it finds bad sectors it then gets a number of consecutive successful reads the block size is then increased back up again to speed up the imaging process.  Outside of the first 4 bad sectors there weren’t any further problems with copying until about 80% into the imaging process:

dd_rescue: (info): ipos: 158322022.5k, opos: 158322022.5k, xferd:    115117.5k
                *  errs:      9, errxfer:         4.5k, succxfer:    115113.0k
             +curr.rate:        0kB/s, avg.rate:     6730kB/s, avg.load:  0.1%
dd_rescue: (warning): /dev/ad1 (158322022.5k): Input/output error!

dd_rescue: (info): ipos: 158322023.0k, opos: 158322023.0k, xferd:    115118.0k
                *  errs:     10, errxfer:         5.0k, succxfer:    115113.0k
             +curr.rate:        0kB/s, avg.rate:     6247kB/s, avg.load:  0.1%
dd_rescue: (warning): /dev/ad1 (158322023.0k): Input/output error!

dd_rescue: (info): ipos: 159550393.0k, opos: 159550393.0k, xferd:   1343488.0k
                   errs:     11, errxfer:         5.5k, succxfer:   1343482.5k
             +curr.rate:    45310kB/s, avg.rate:    29621kB/s, avg.load:  0.7%

At this point the copying slowed right down because dd_rescue started working with tiny blocksizes, i eventually got tired of waiting and cancelled the process to launch it again with a start position of a few thousand increments from the problematic position.. It started off very fast and then encountered more errors.. these errors got gradually less and it seemed i’d eventually bypassed that dodgy area (presumably this was an area of the disk which got alot of writes).  For a 200GB drive the dd_rescue imaging process was suprisingly fast (must have taken less than an hour!). One the process finished i fdisk’d the target disk:

 [root@orion] (/dev): fdisk /dev/ad6
******* Working on device /dev/ad6 *******
parameters extracted from in-core disklabel are:
cylinders=969021 heads=16 sectors/track=63 (1008 blks/cyl)

Figures below won't work with BIOS for partitions not in cyl 1
parameters to be used for BIOS calculations are:
cylinders=969021 heads=16 sectors/track=63 (1008 blks/cyl)

Media sector size is 512
Warning: BIOS sector numbering starts with sector 1
Information from DOS bootblock is:
The data for partition 1 is:
sysid 165 (0xa5),(FreeBSD/NetBSD/386BSD)
    start 63, size 398283417 (194474 Meg), flag 80 (active)
        beg: cyl 0/ head 1/ sector 1;
        end: cyl 1023/ head 254/ sector 63
The data for partition 2 is:
<UNUSED>
The data for partition 3 is:
<UNUSED>
The data for partition 4 is:
<UNUSED>

This looks good. The target drive was actually a 500GB drive, and now fdisk is reporting to see it as 200GB :) .. next I decided to see if a reboot was required in order for devfs to notice the new slices.

 [root@orion] (/dev): ls ad6*
ad6     ad6s1   ad6s1c  ad6s1e

Even better.  Next it was time to FSCK the s1e slice..:

 [root@orion] (/dev): fsck /dev/ad6s1e
** /dev/ad6s1e
Cannot find file system superblock

LOOK FOR ALTERNATE SUPERBLOCKS? [yn] y

USING ALTERNATE SUPERBLOCK AT 32
** Last Mounted on
** Phase 1 - Check Blocks and Sizes
INCORRECT BLOCK COUNT I=38402498 (71232 should be 65792)
CORRECT? [yn] y

INCORRECT BLOCK COUNT I=38402499 (81648 should be 32992)
CORRECT? [yn] y

INCORRECT BLOCK COUNT I=38413449 (6768 should be 208)
CORRECT? [yn] y

INCORRECT BLOCK COUNT I=38413450 (7424 should be 208)
CORRECT? [yn] y

INCORRECT BLOCK COUNT I=38413451 (6000 should be 208)
CORRECT? [yn] y

INCORRECT BLOCK COUNT I=38413452 (6768 should be 208)
CORRECT? [yn] y

etc.

At this point I figured I should have almost passed the -y flag to fsck to auto respond YES to any prompts.. but thankfully fsck didn’t ask any more questions after that initial bunch…

 
183419 files, 123017087 used, 70007255 free (66399 frags, 8742607 blocks, 0.0% fragmentation)

***** FILE SYSTEM MARKED CLEAN *****

***** FILE SYSTEM WAS MODIFIED *****

Success!  200GB of data which was completely lost was completely recovered.